
Neapolitan-style pizza is the easiest pizza you’ll make. All the flavor and texture are done for you; you only have to wait. The dough takes less than 20 minutes to make with four ingredients and is ready to bake the next day. But, if you leave it longer, it develops even deeper flavors and lightness as it ages.
But I want to point out there are many ways to make a pizza crust better, such as adding sugar to enhance the caramelization, oil to soften the crust, or using preparation methods like Tangzhong or Yudane to have a higher rise, faster browning, and slower staling. However, none of them are superior to cold fermentation.
What happens at 72 hours?
If you’ve been checking out pizza recipes, you might have seen that doing a long, cold fermentation is recommended. But why? It’s not because 72 hours is some magical number. It’s just an example of how much time is needed to get really good results. However, even if you let it ferment for less or more than 72 hours, it’s still a good idea to do a long, cold fermentation because:
Better Flavor and Texture. The difference between a 24-hour and 48-hour fermented dough is remarkable. When left to ferment for 72 hours, it reaches its peak. The flavor and texture become much better.
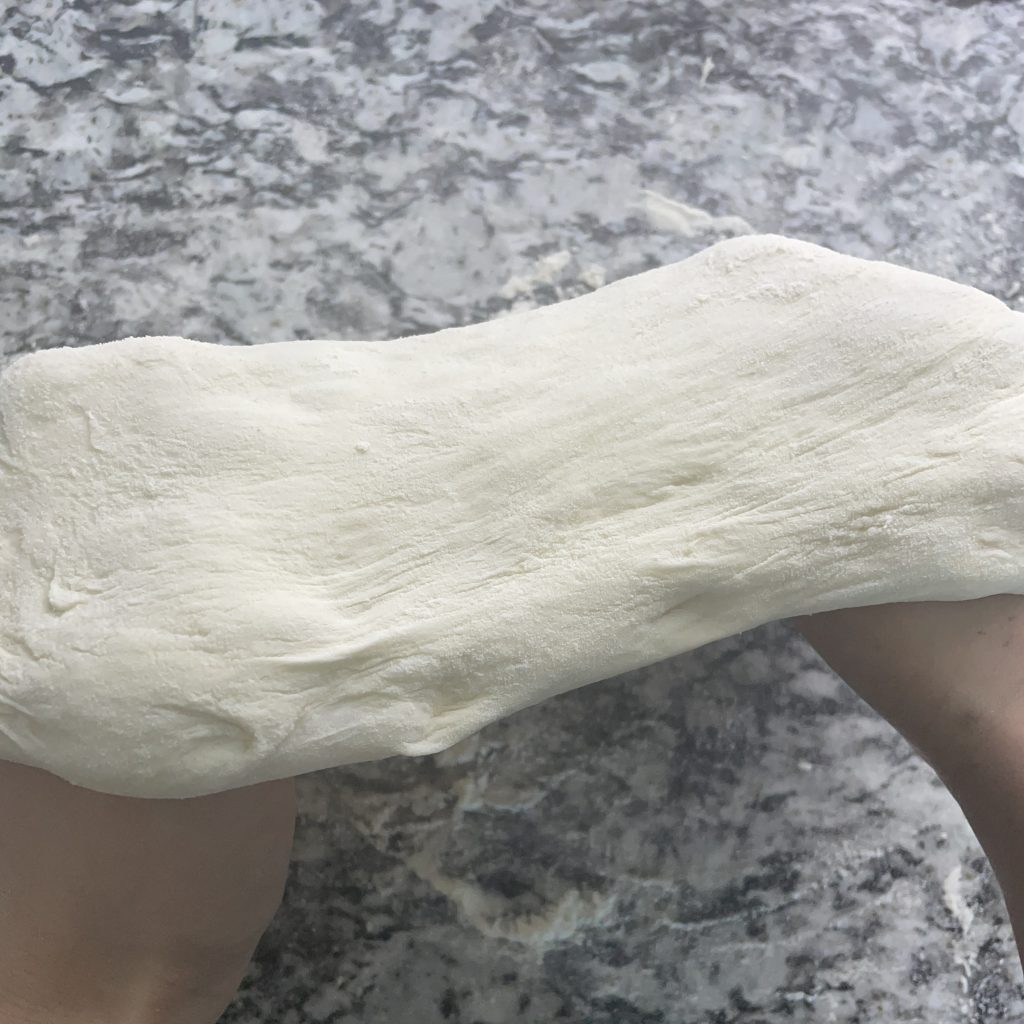
Allowing the dough to ferment for an extended period at a lower temperature (between 40-65°F) causes the yeast to slowly convert sugar into carbon dioxide. This gives enzymes more time to break down starch granules into simple sugars and gluten proteins (gliadin and glutenin) to align into long strands. This creates complex flavors, the caramelization of the crust, and large air pockets.
Quicker cooking. This is due to the breakdown of starch into simple sugars during the long fermentation time. As a result, more brown spots appear on the top of the crust, and your pizza will be ready in just 6-7 minutes. Additionally, your crust is fully cooked before the cheese burns.
Let the dough ferment in the refrigerator (40°F) for at least 48 hours for the best results. You will notice an incredible difference in flavor, texture, and color.
Day 1 (24 hr) – baked about 7-8 minutes; light fermentation scent, more dough scent; chewy crust, small crumb structure, dough taste.
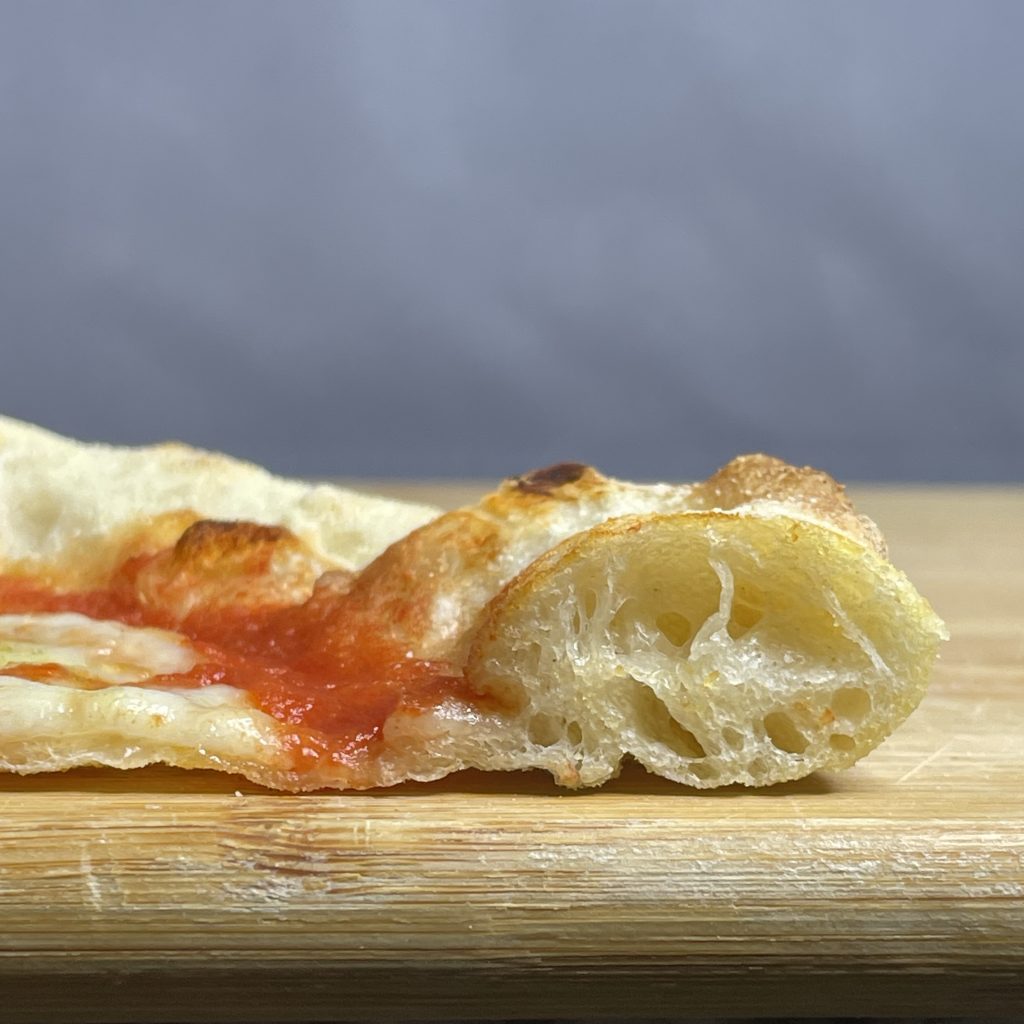
Day 2 (48 hr) – bake time reduced to 6-7 minutes; fermentation scent is fragrant; very light, large air pockets, crispy crust; hard to describe complex flavors.
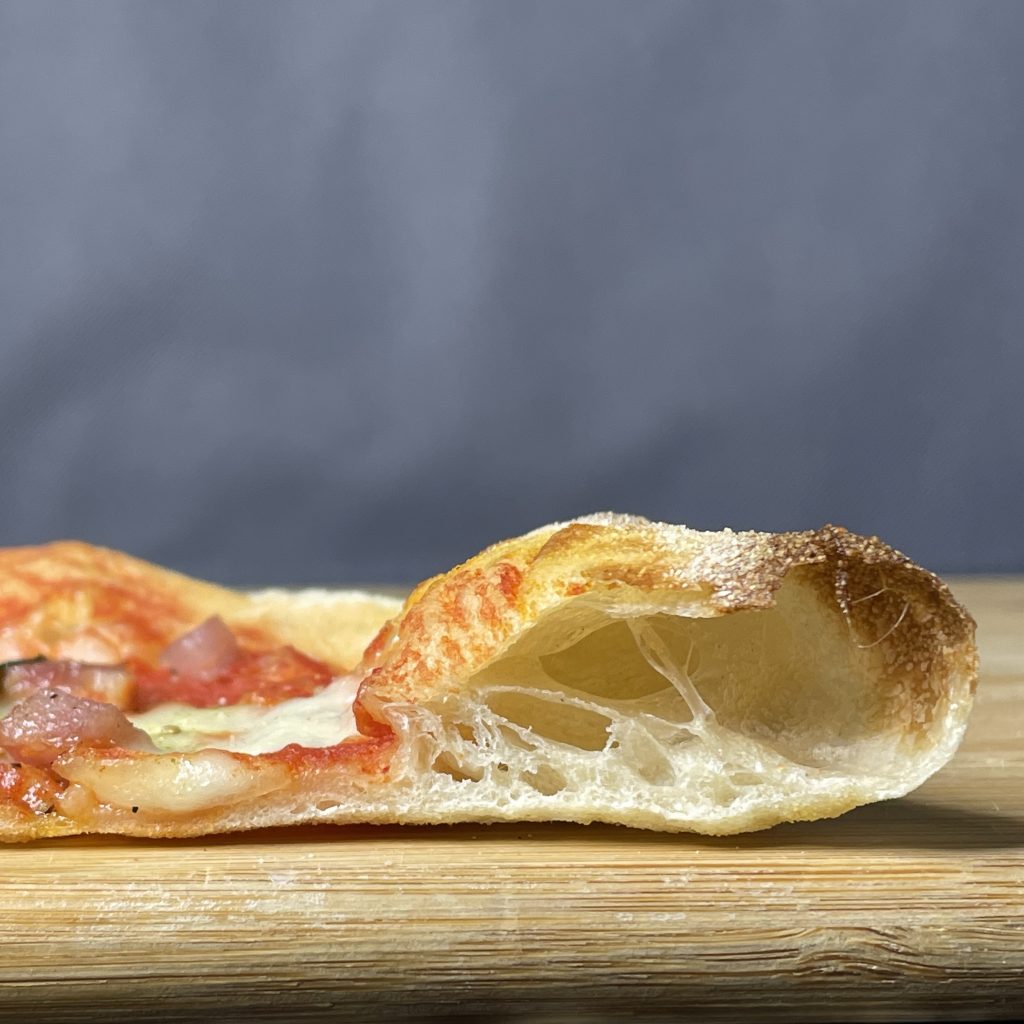
Day 3 (72 hr) – bake time reduced by 6-7 minutes; fermentation scent is very fragrant; very light and soft with a crispy crust.
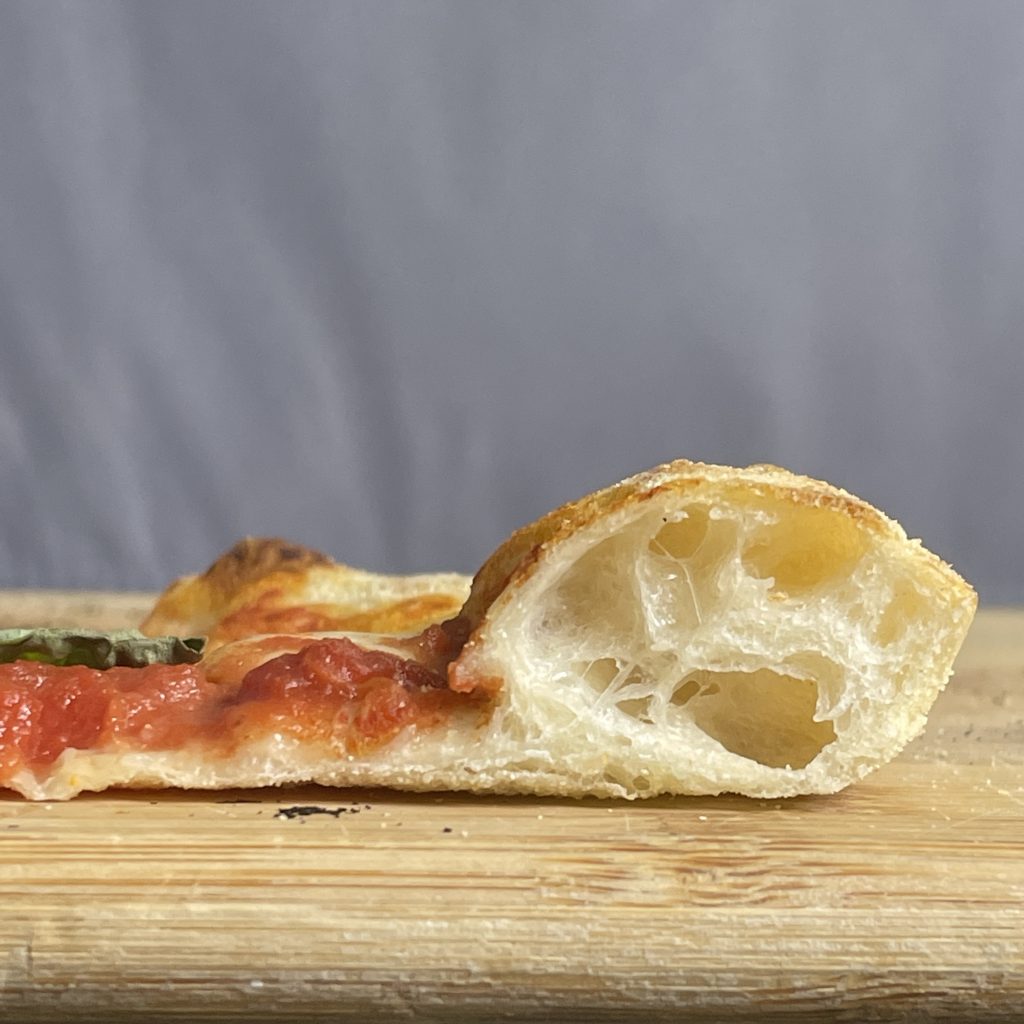

I’ve tested up to 8 days, and the longer you let the dough ferment, it’ll taste and look more like sourdough bread with its oblong crumb structure. You’ll start to notice these changes around day 5.
Why it’s the easiest pizza dough recipe
This simple recipe makes great homemade pizza dough without using kitchen scales. All you need is a measuring cup. While kitchen scales are precise, they are not always necessary. Here’s why:
The dough is forgiving when it comes to hydration. This pizza dough recipe uses bread flour with a hydration level of 70%, but anywhere between 68% to 75% is manageable. If you add less water, the dough will have a firmer texture and require less delicacy when shaping. On the other hand, if you add more water, the dough will be softer and require more delicacy when shaping. With some practice, you’ll get a feel for the dough and how much water it needs. Feel free to experiment to find the best hydration level for you.
However, a concern with using cups instead of a scale is that the amount of flour you scoop may differ each time. See Tips and Tricks to reduce this error.
Don’t worry too much about the quantity of yeast or salt. It’s more likely that you will use too much yeast rather than too little. Yeast consumes the sugars in the flour and multiplies, so most long fermentation dough recipes recommend using only 0.5% to 1% of the total flour weight. For salt, if the dough tastes salty, you’ve added too much.
Ingredients and tools
A Neapolitan pizza dough recipe uses 00 flour, finely-ground soft wheat. However, it’s not the most accessible ingredient in the States, so we’ll be using bread flour which uses ground hard wheat.
Ingredients
- Bread flour: use high-protein flour with a protein content of 12%-13%. All-purpose flour has about 11%.
- Water: I use tap water without warming it without any issues. This recipe uses 70% hydration, but anywhere between 68%-75% for bread flour has yielded great results.
- Active dry yeast or instant yeast
- Sea salt: I go back and forth with course or fine sea salt.
- Olive oil: extra virgin olive oil, if possible.
Tools you will need
- Measuring cups
- Pizza stone or pizza steel (for a fully-cooked bottom crust)
- Bench scraper (optional, but helpful in dividing and shaping dough and cleaning kitchen countertops)
- Pizza peel
Step-by-step instructions
- Mix and knead the dough. It takes about 10-12 minutes by hand or 7-8 minutes using a stand mixer with a dough hook attachment for the dough to go from a rough mixture into an elastic dough.
- To mix by hand, mix all the ingredients in a large bowl until a dough forms. Then, to knead, use use either the palm of your hands and push outwards and back. Sometimes, to keep my kitchen countertop clean, I keep the dough in the bowl and use a wooden spoon to move it side-to-side until the dough becomes slightly shiny, sticky but leaves no residue on my finger.
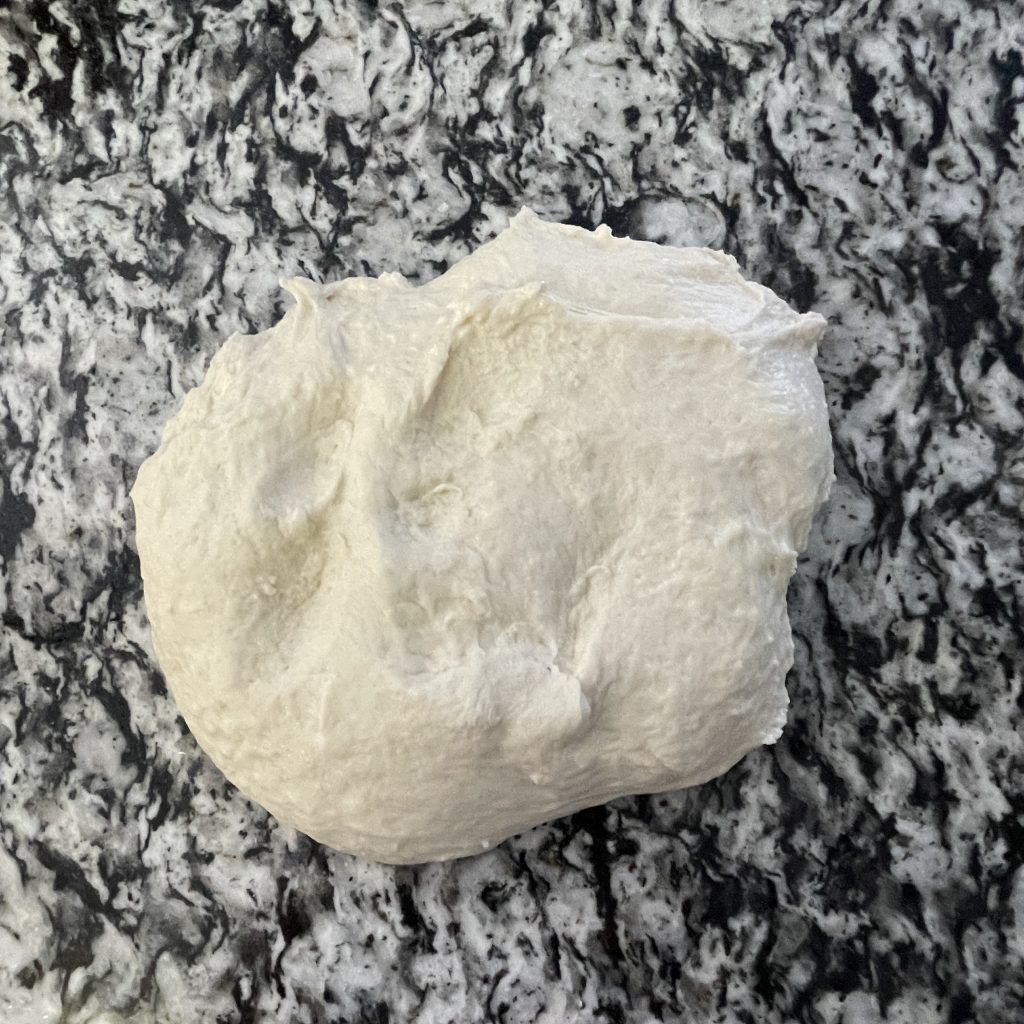
- Divide and shape dough balls. Divide into three equal portions. Then tuck the edges underneath to form a smooth ball.
- Transfer to a container. Add a little olive oil to the plastic wrap and container to prevent sticking. Yeast produces gas, so don’t close your air-tight container.
- Let it rest. Let it rest at room temperature for 30 minutes to 1 hour to start the yeast process; the dough will go from a tight ball to a loose ball. Then, stick it in the fridge for 72 hours.
- Reshape and rise again. When cold, shape it back to a tight smooth ball and bring it to room temperature. This will take about 1-2 hours.
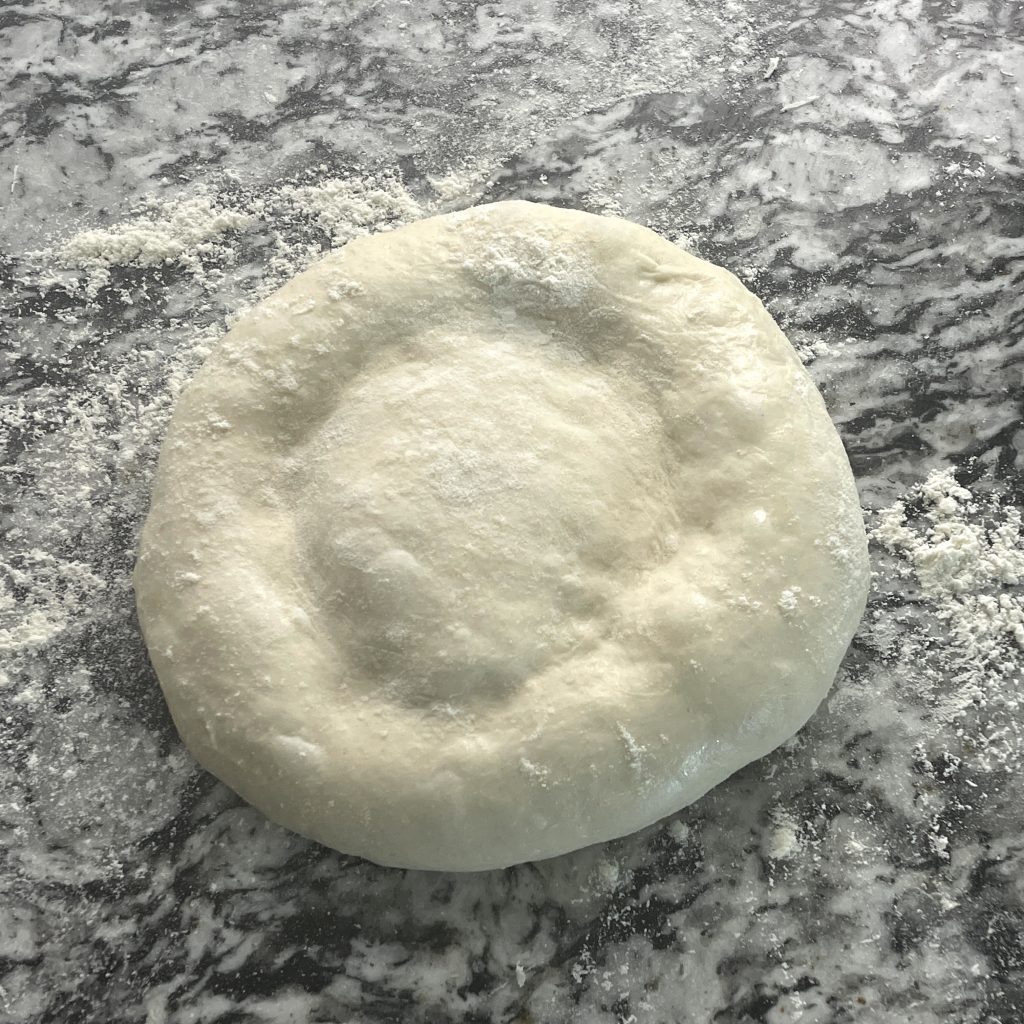
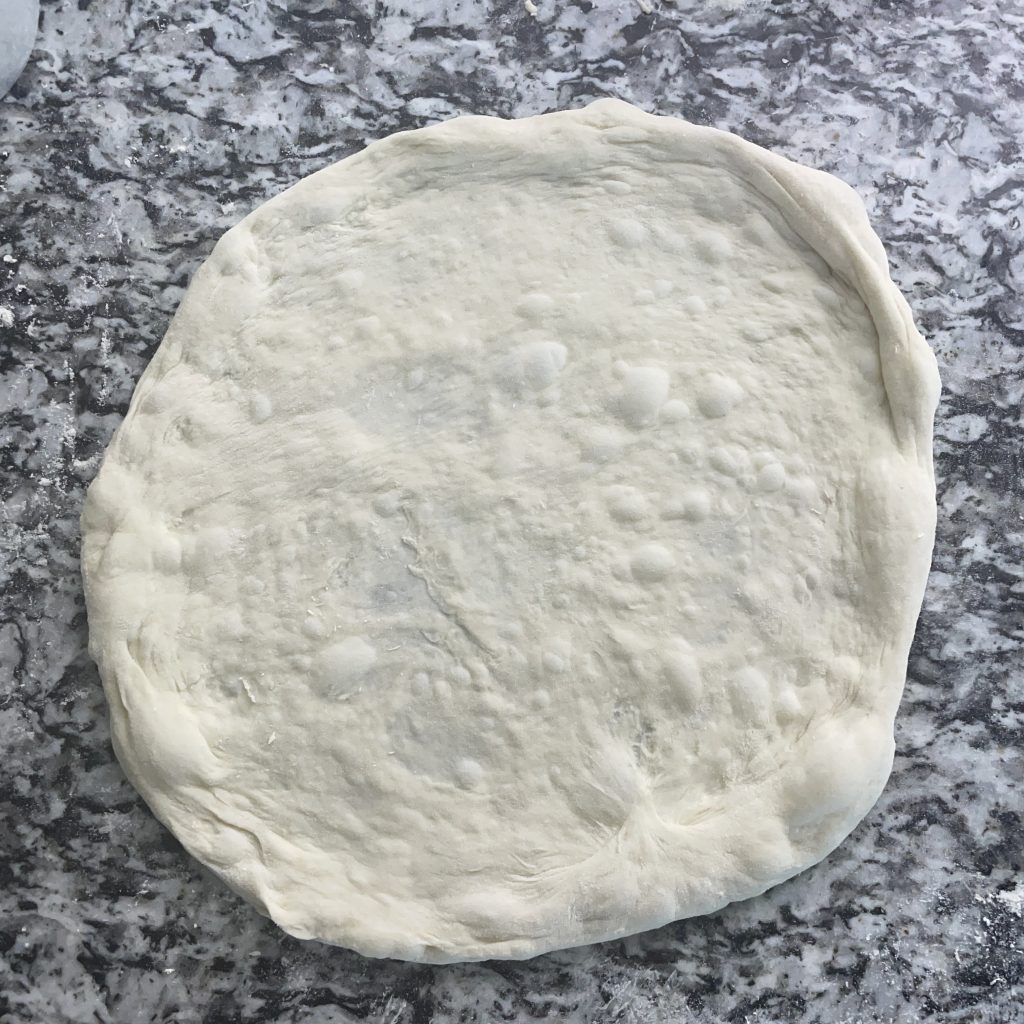
- Stretch it. Transfer the dough to a floured surface, and make sure the smooth side is at the top. Press down to create an inner ring and stretch it into a circle.
Tips and tricks
Fluff and level your ingredients. When scooping flour or any other ingredient, fluff it with your measuring cup before scooping it to get a loosely-packed cup. Then use a straight edge utensil like a knife to level off the top.
Blooming your yeast is unnecessary if your yeast has not expired and has been stored in a refrigerator. You can dump it into the dry mixture.
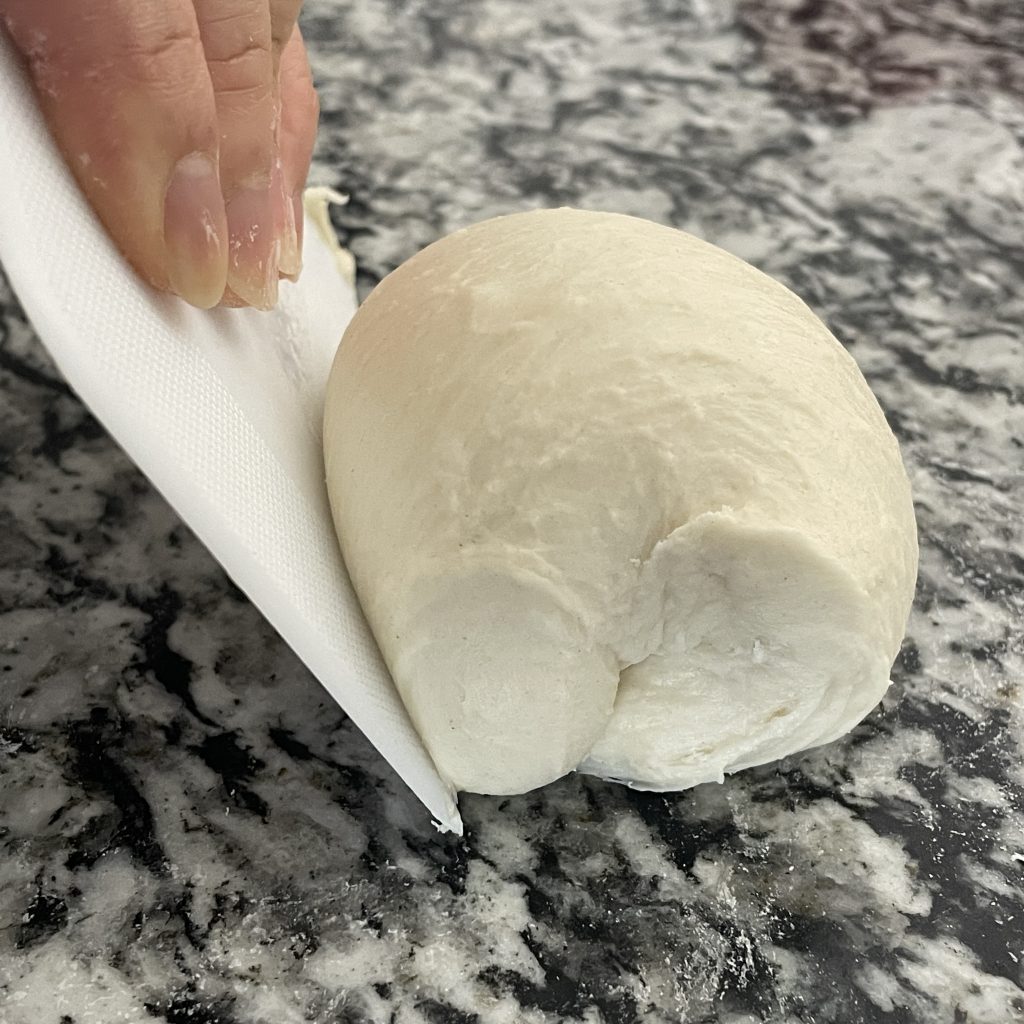
Shaping your dough ball is as easy as tucking the edges underneath the dough. Here’s my favorite way using a bench scraper (keeps my hands clean).


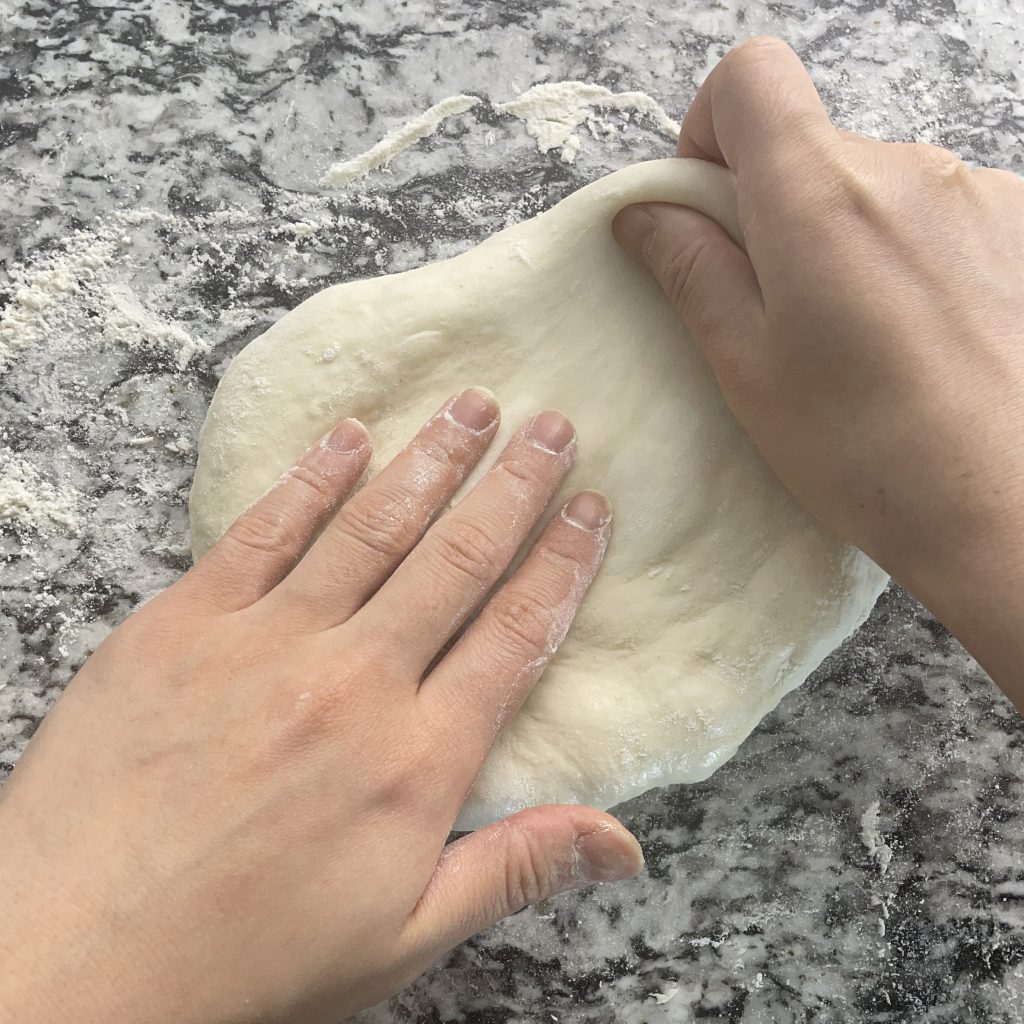
Get a high crust by making an inner ring below the crust. Then press and stretch from the center and avoid pressing the edges.
Popping air pockets is your choice. I like air pockets because they brown faster than the rest of the crust, making it look like a Neapolitan-style pizza. You should keep as many bubbles as possible, but it can look uneven if you have too many or if they’re huge, so pop them with your judgment.
Bake on a pizza stone or baking steel on the highest rack for a fully cooked bottom and browned top.
Make your pizza fancy using coarse flour like semolina on your work surface when stretching your pizza. Coarse flour doesn’t absorb into the dough as fast so it won’t leave an ashy white color on the crust. Plus, it makes the crust extra crispy.
Troubleshooting tips
Let me share some key moments and lessons I’ve learned to help you confidently make pizza and troubleshoot any concerns.
I forgot to add the yeast or salt to my kneaded dough. This has happened to me before due to my own distractions, and I don’t want to waste my dough. Thankfully, bread-making is a forgiving process. The dough takes time to hydrate all the molecules in the flour, so slice the dough, add the salt and yeast, knead, rest, and repeat until smooth.
Left the dough out at room temperature for too long, and there are holes. Reshape it into a tight dough ball and let it rise again.
Conclusion
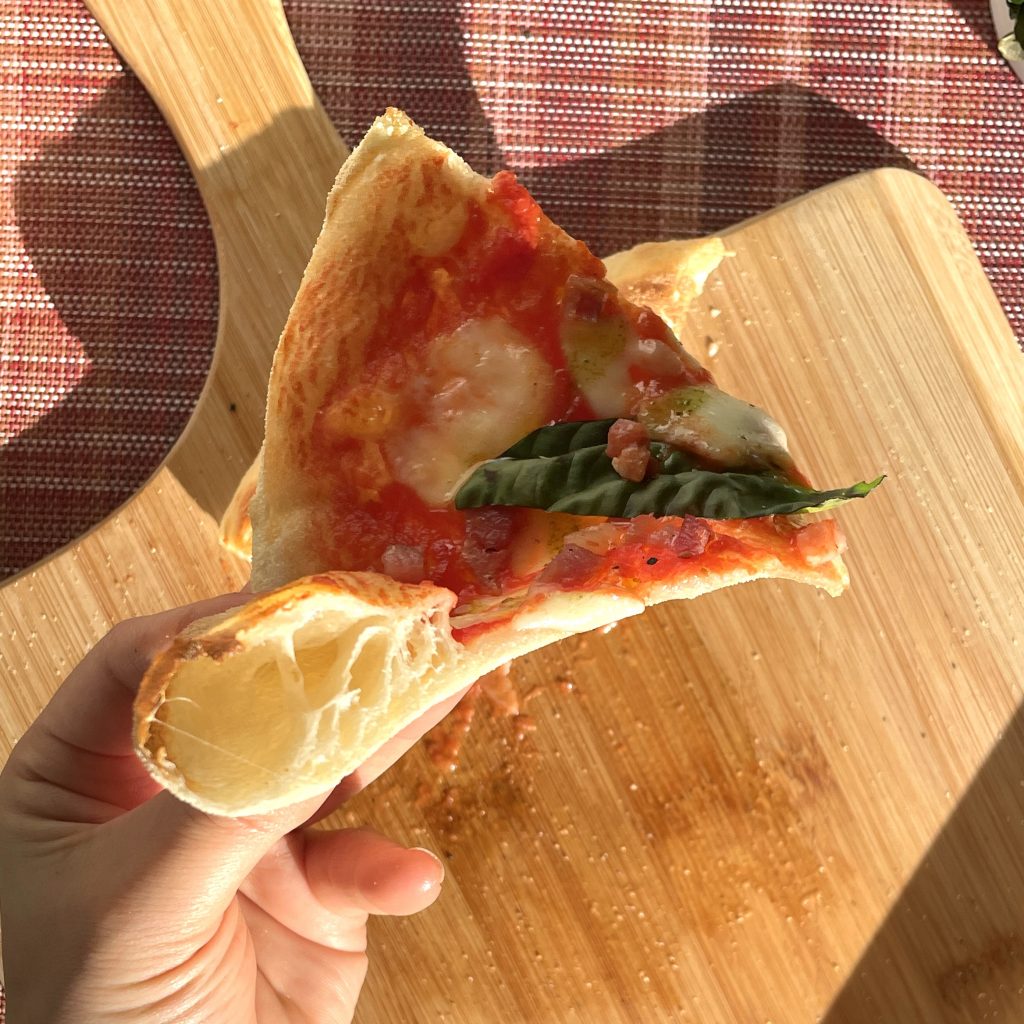
Now if you’re patient enough, you can take these simple ingredients into a super flavorful, super crispy, out-of-this-world, truly memorable, and tasty Neapolitan-style pizza at home.
72-Hour Cold Fermented Pizza Dough
Cuisine: ItalianDifficulty: Easy3
servings20
minutes7
minutes72
hours72+
hoursA light and crispy pizza crust made from four ingredients.
Ingredients
2 cups (306g) Bread flour
1 cup (214g) Water
1 ¼ tsp (6g) Sea salt
3⁄4 tsp (2g) Active dry yeast
Extra virgin olive oil for coating the container
Semolina flour (optional) for shaping and stretching the dough
Directions
- Mix and knead by hand (approx. 10-12 min)
- In a large bowl, add all the ingredients: flour, water, yeast, and salt.
- Use your fingers to mix the dry parts into the water until the water is gone. Then knead by using the palm of your hands to push the mixture outwards and back. 💡Tip: use a bench scraper to clean your hands in between.
- Your dough is ready when it looks smooth and slightly shiny, with little to no residue when poked. Go to step “Divide and shape dough”
- Or mix and knead with a stand mixer (approx. 7-8 min)
- Add flour, water, yeast, and salt to the bowl of a stand mixer.
- Mix on low speed for 7-8 minutes. You may need to scrape the sides of the bowl to ensure all of the mixture is combined.
- Check the dough by lifting the stand mixer head. The dough should fall slowly off the hook and should pull off cleanly when scooping it from the bowl.
- Then go to step “Divide and shape dough”.
- Divide and shape dough
- Divide the dough into three parts and shape each into a tight smooth ball by tucking the edges underneath. Rotate and continue tucking to your desires. 💡Tip: Oil your hands to prevent the dough from sticking; adding flour will change the hydration level.
- Place dough balls in an oiled container and cover with oiled plastic wrap or lid.
- Allow dough to rest at room temperature for 30-60 minutes for the first rise (yeast activation), then refrigerate to ferment for 48-72 hours.
- 48-72 hours later
- Take the dough out from the refrigerator and shape the dough into a tight smooth ball and let it rest for 1-2 hrs until it comes back to room temperature and has doubled in size.
- Transfer the dough to a floured surface (bread or semolina flour) and create an inner ring to create the crust and stretch the middle into a 10″ circle. You’ll want light to pass in the center but not the crust.
- Add your favorite tomato sauce, fresh mozzarella cheese, and toppings, and bake at 550°F for 6-7 minutes or at 500°F for 12-15 minutes. 💡Tip: preheat the oven with a pizza stone or baking steel set on the highest rack to get a fully-cooked bottom and browning on top.
Notes
- You do not need to heat up the water. Just use tap water or water that is at room temperature.
- To make a light and crispy crust, bake the pizza at 550°F for at least 6-7 minutes. For a crunchier crust, bake it for 10-12 minutes.
- Fluff and scoop your flour, then scrape off the excess with a knife to get a loosely-packed up.
- The “mix and knead” time will create adequate gluten development since the gluten strands will continue to strengthen and align during the long resting period.