
In the pursuit of perfecting a really good pizza using a home oven, the biggest constraint is the low heat compared to a wood-fired oven. Pizza made at home needs to be baked longer, doesn’t brown fast enough to achieve leopard-spotting, and trying to increase the bake time to do so results in a thick crunchy crust. So, water roux made by Tangzhong or Yudane method caught my attention because it’s a way to improve bread characteristics by cooking flour. This method is commonly used in Asian bread recipes such as Hokkaido milk bread or Shokupan for its high rise, moisture retention, softness, and sweetness. I thought one of these effects could help achieve faster browning or softer crust. The results and benefits of this method took me by surprise.
Table of contents
What is Tangzong/Yudane?
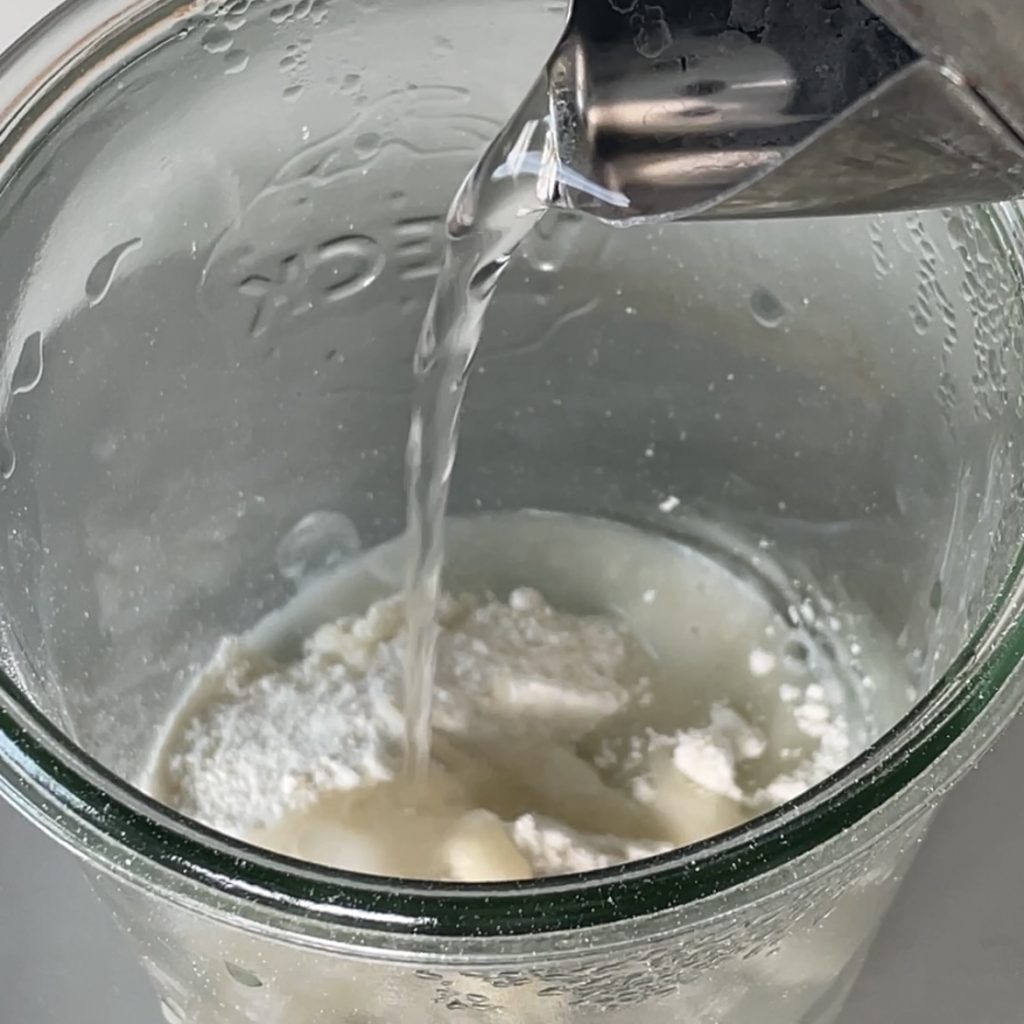
Yudane method is pouring hot boiling water over the flour, while Tangzhong method thickening water and flour over a stove. Yudane method is often used interchangeably with Tangzhong method. However, both methods translate to the same thing, “boiled dough,” and trigger a starch gelatinization process — where heat breaks down the starch molecules in water — and rested back to room temperature (or used the next day after a rest in the refrigerator) to be mixed in with the rest of the dough.
By using this method, a small portion of the dough converts to gelatinized starch which is an irreversible process that denatures gluten proteins, thus lowering the protein content of the total flour, so the amount in a recipe is a balance between adding softness and not compromising the dough’s gluten development.
The best amount is up to individual preference, but a research article referenced by Novita Listyani, mentions at least 10% and up to 30% in a recipe. Anything under 10% does not have remarkable differences, and anything more than 30% will inhibit (slow down) gluten development, resulting in a cake-like texture.
How to make Yudane
For the reasons mentioned above, I find Yudane method more convenient and controllable than Tangzhong method. However, there’s still room for error because the dough temperature must be over 140°F while mixing it.
I modified the original recipe of making Yudane dough from a 1:1 ratio of flour to water to a 1:2 ratio of flour to water to make the mixing easier.
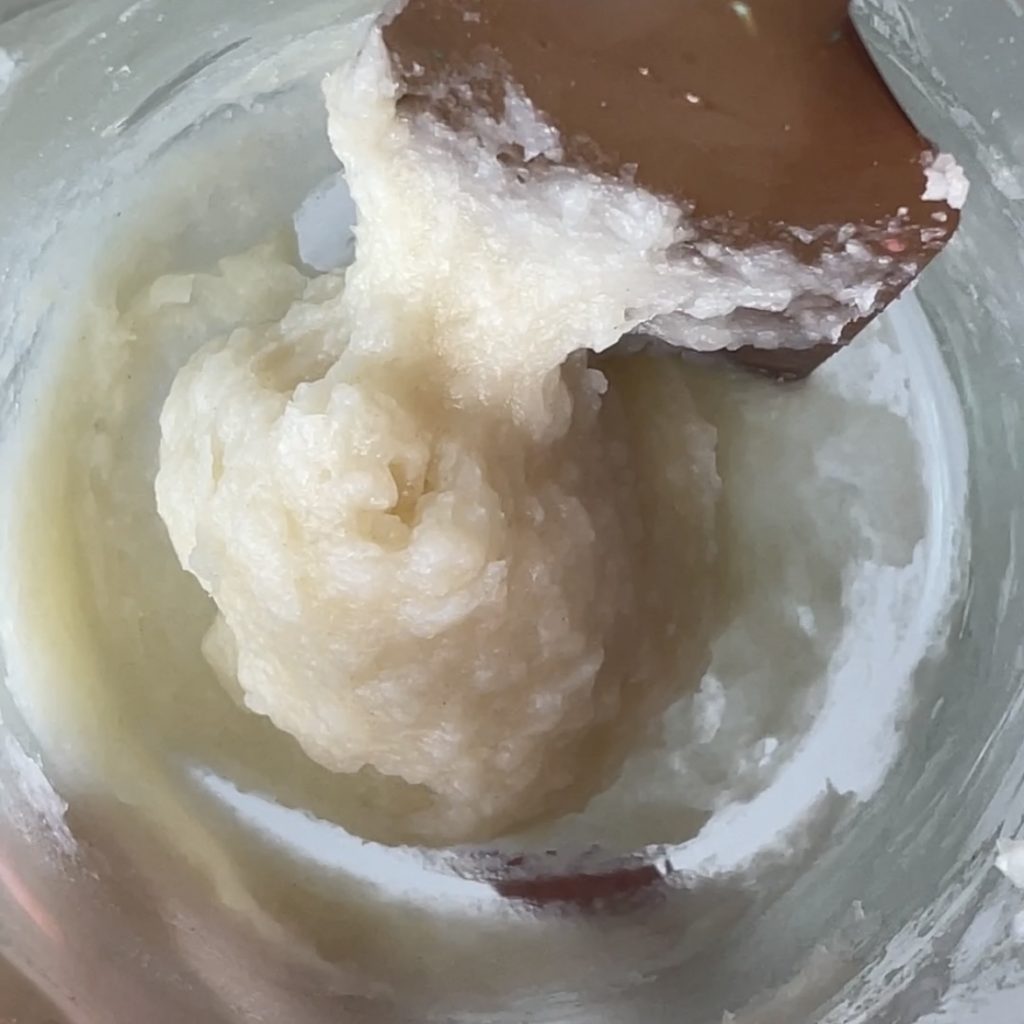
To get the best results, I microwave a container, get it around hot to the touch (160-180°F) and mixed 1:2 the flour and boiling water into gelatinized flour, and brought it to room temperature before using it with the rest of the ingredients.
How it went
How it was conducted
It should be noted that the total flour amount doesn’t change. However much roux you add replaces regular flour. For example, if you add 10% roux, you should remove 10% regular flour. To see the effect, I’ve tested a few percentages (5%, 10%, 15%, 20%). Each dough is prepared with 100g of bread flour and 75g of water (75% hydration). Then replace a portion of the flour with the appropriate percentages and ferment it for at least 24 hours, and bake at the highest temperature, 550°F, until entirely brown. The final dough will have a high moisture content due to the starch granules holding onto more water molecules.
Ingredients and measurements
Yudane dough: [5, 10, 15, 20]g bread flour, [10, 20, 30, 40]g boiling hot water.
Main dough: [95, 90, 85, 80]g bread flour, [65, 55, 45, 35]g tap water, 1.65g sea salt, .65g active dry yeast.
Making the dough
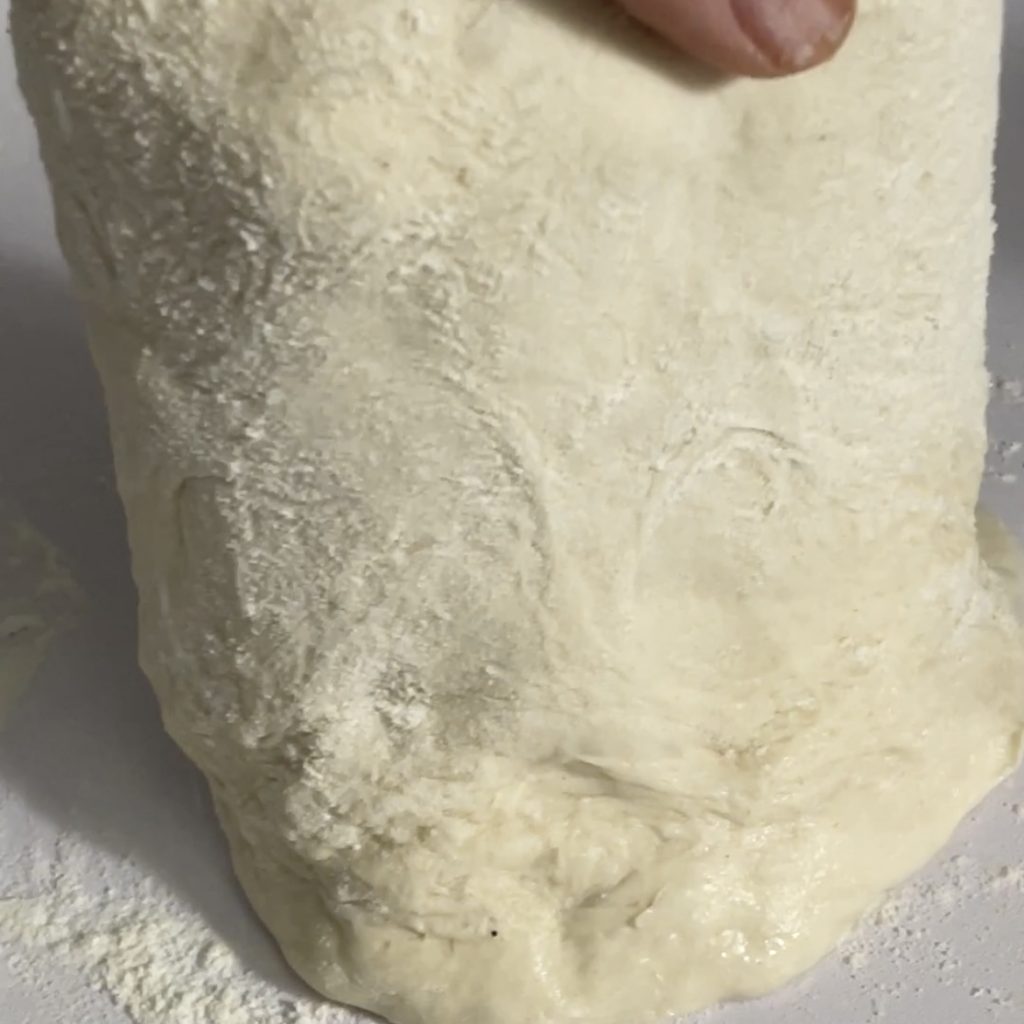
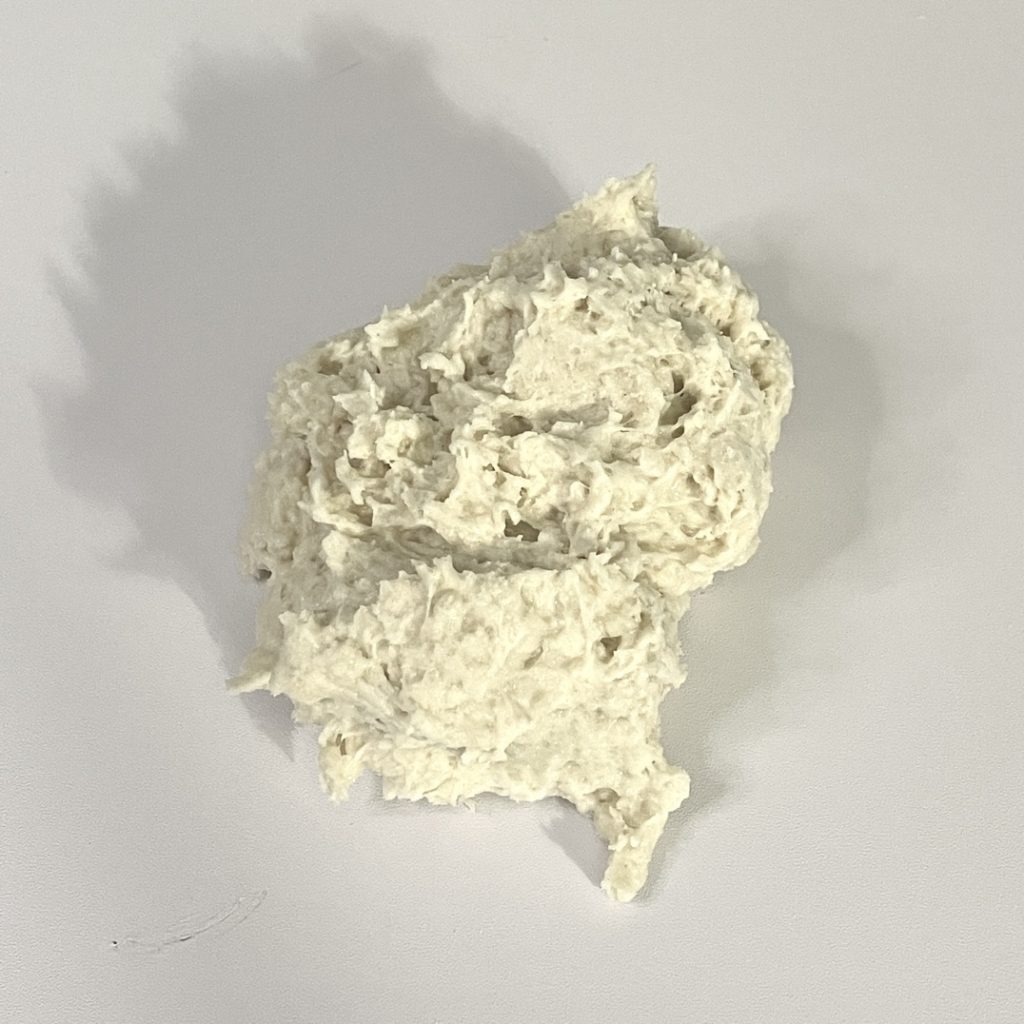
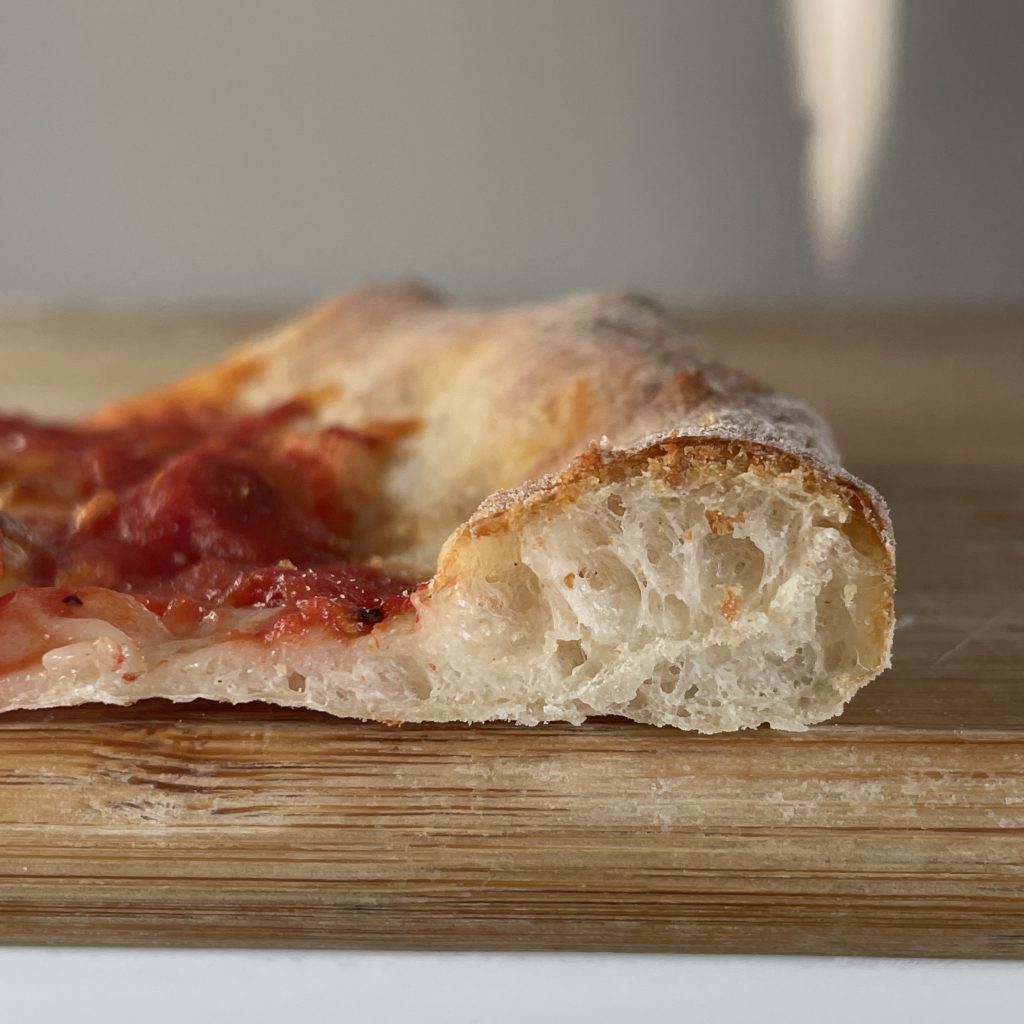
The control dough is soft, silky, and stretchy. Replace 15% of the recipe with water roux; the dough feels tough and becomes difficult to mix and knead; replace 20%, which will feel even tougher, see image 3.
The dough becomes plastic as you increase the roux percentage. When shaping the dough, the control is stretches easily and droops when lifted, which is also observed at 5% and 10%. However, at 15%, that effect is gone and holds its shape. At 20%, the dough became so tough to knead that I had to add more water to soften it.
👀
Observation
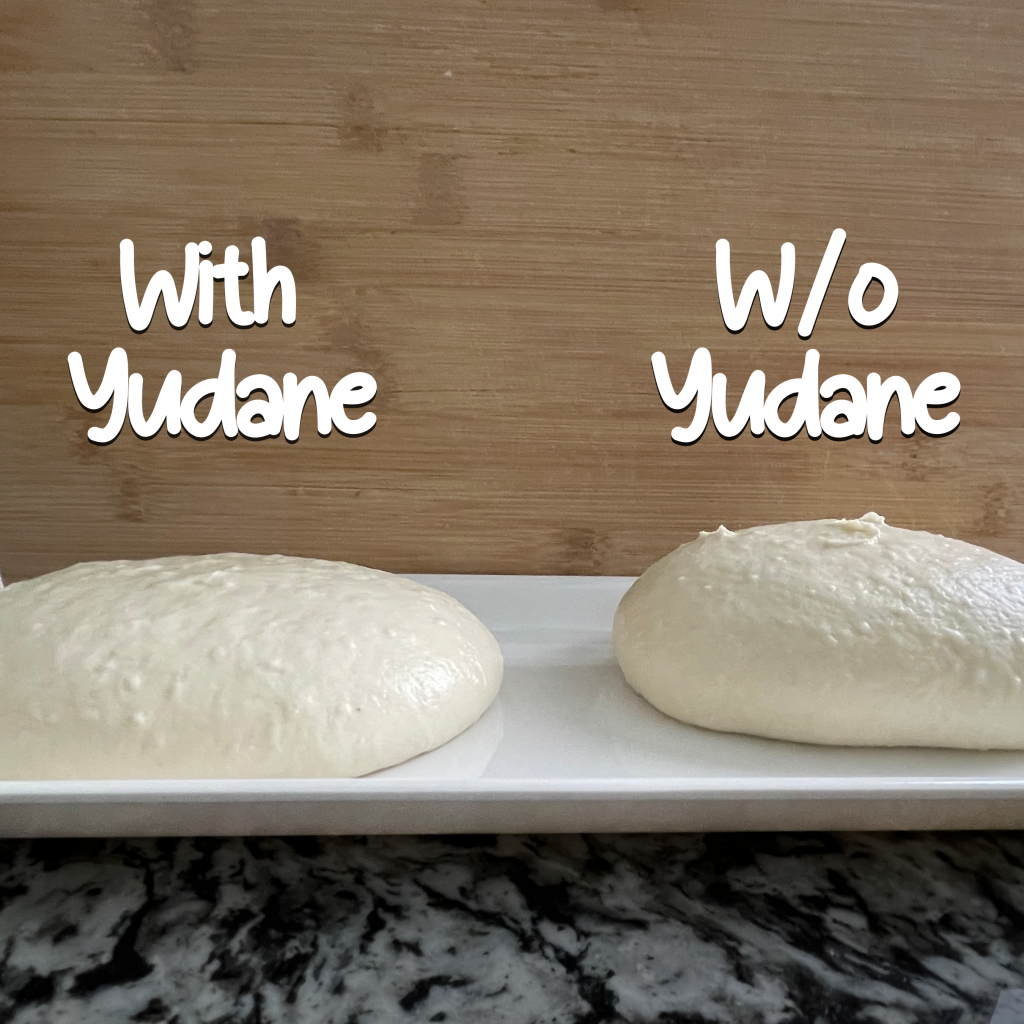
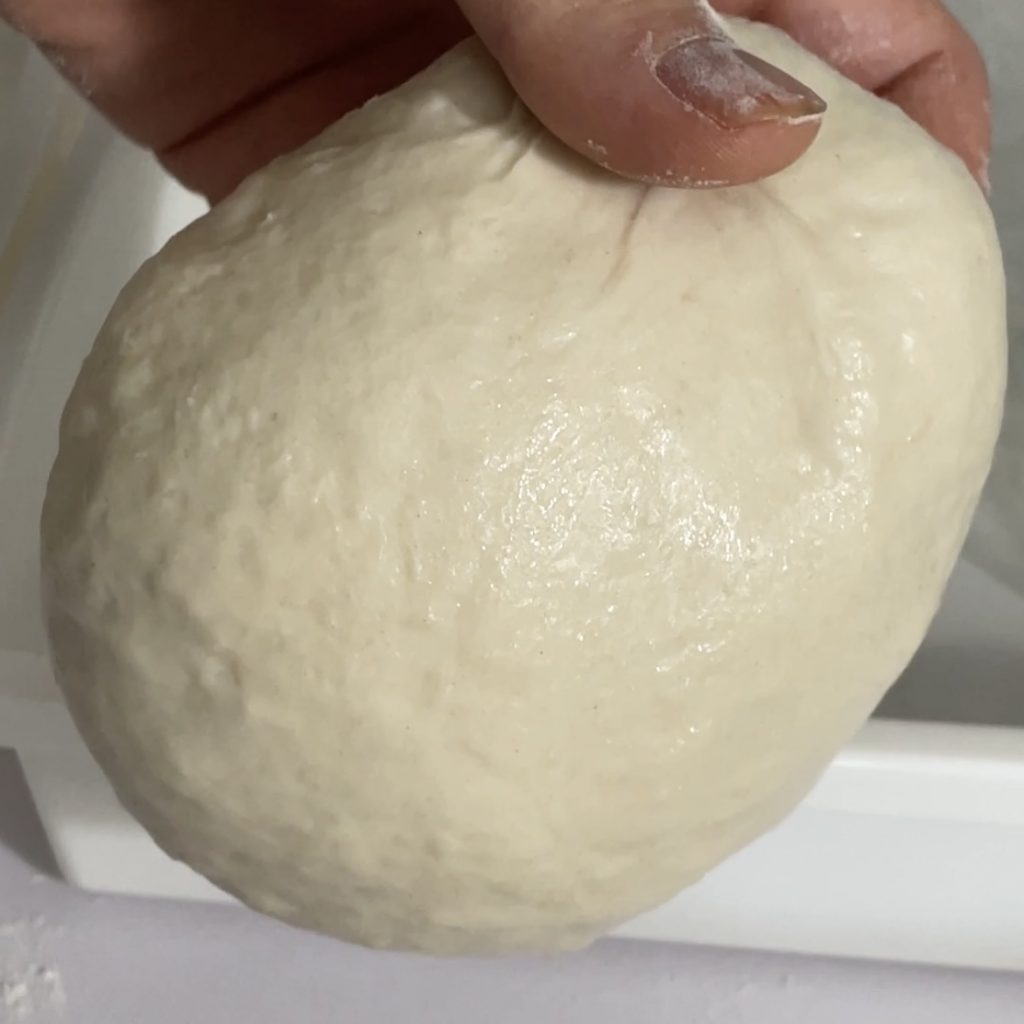
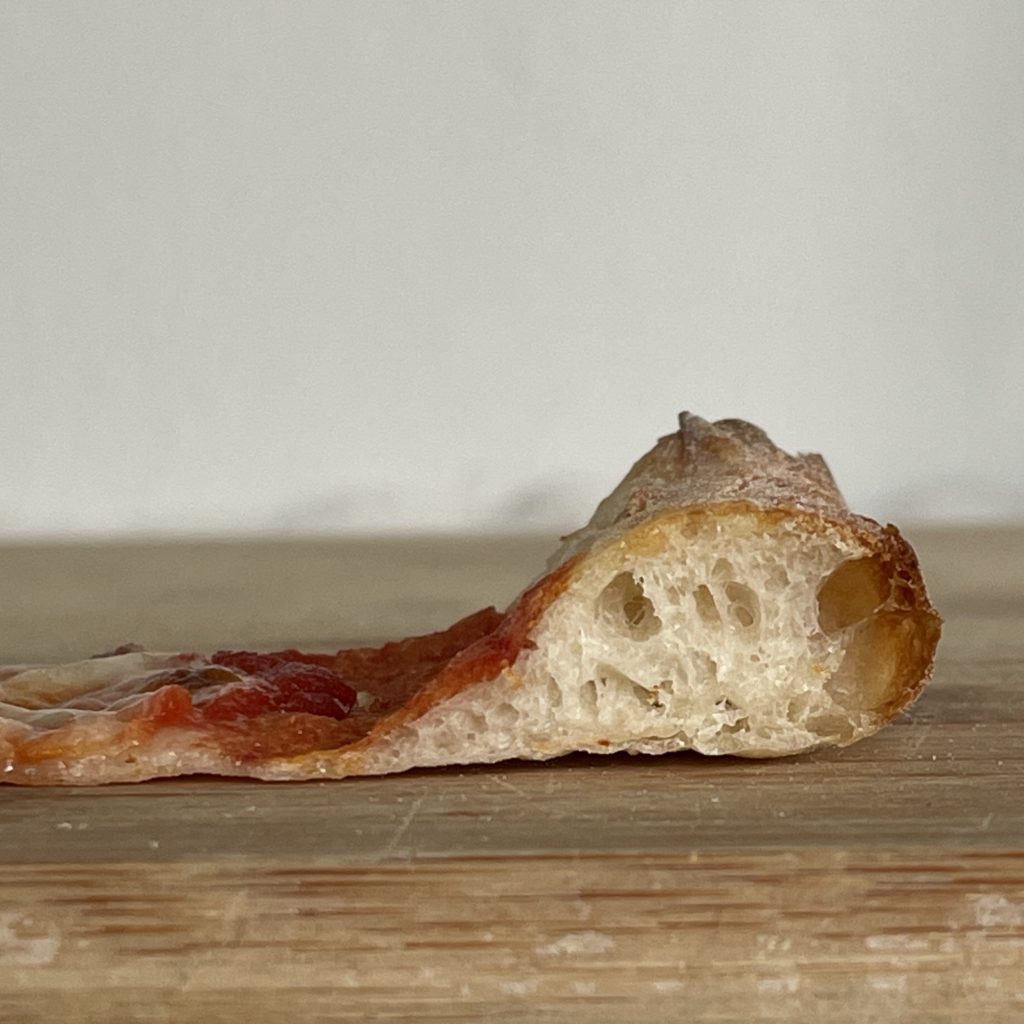
Control – super elastic; droops when lifted. See image 1
5% – droops when lifted, but less than control.
10% – droops when lifted, but slowly.
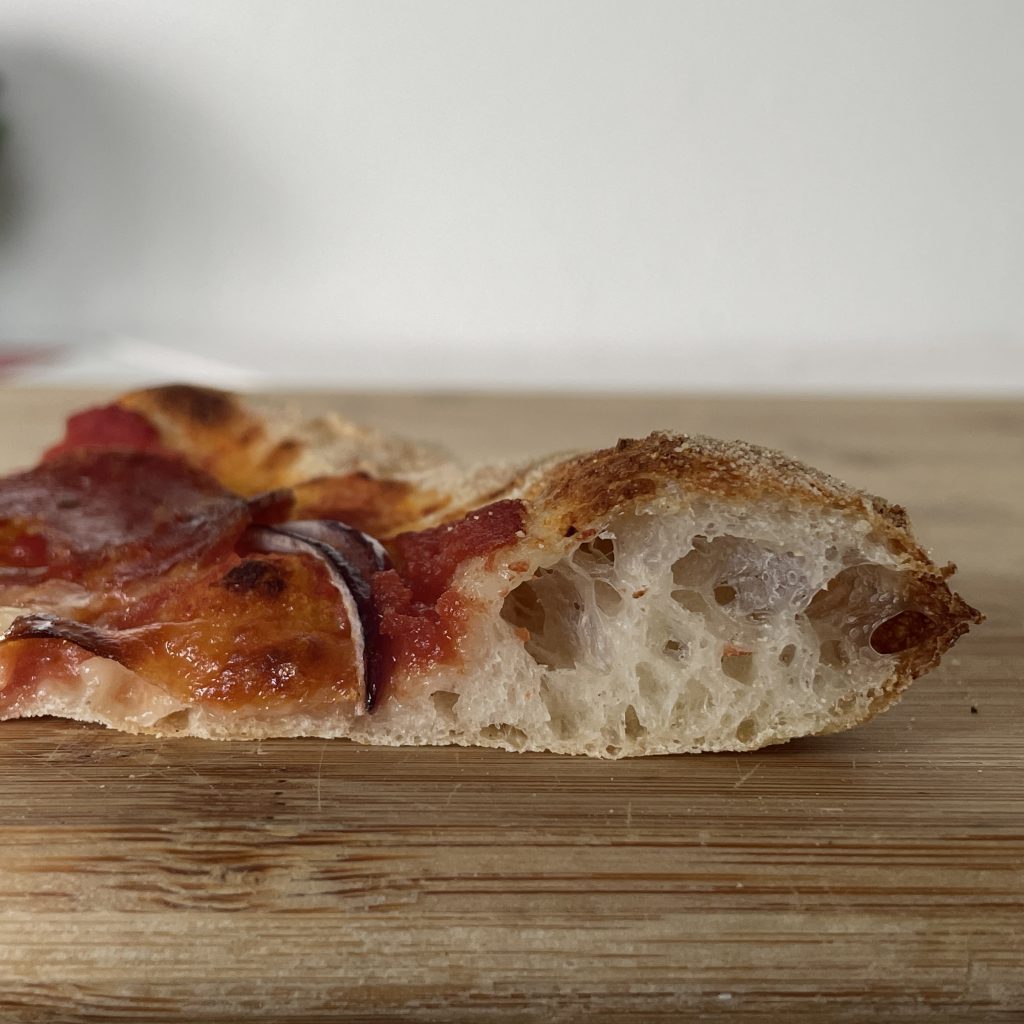
15% – tough and holds shape when lifted. See image 2
20% – tougher and holds shape when lifted. Required more water to soften.
24 hours later – Stretching into pizza
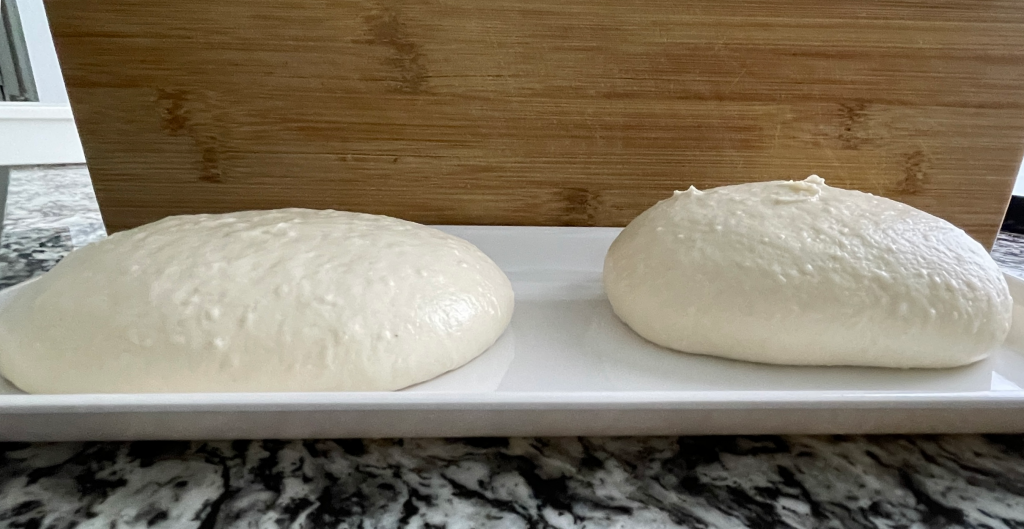
After cold fermentation, I shaped the dough into a tight ball and let the dough rise. The dough with water roux grew vertically, while the control dough grew horizontally. The water roux doughs also became more flexible and durable as the amount of water roux increased, while the control dough stayed stretchy without resistance.
Baking the pizza
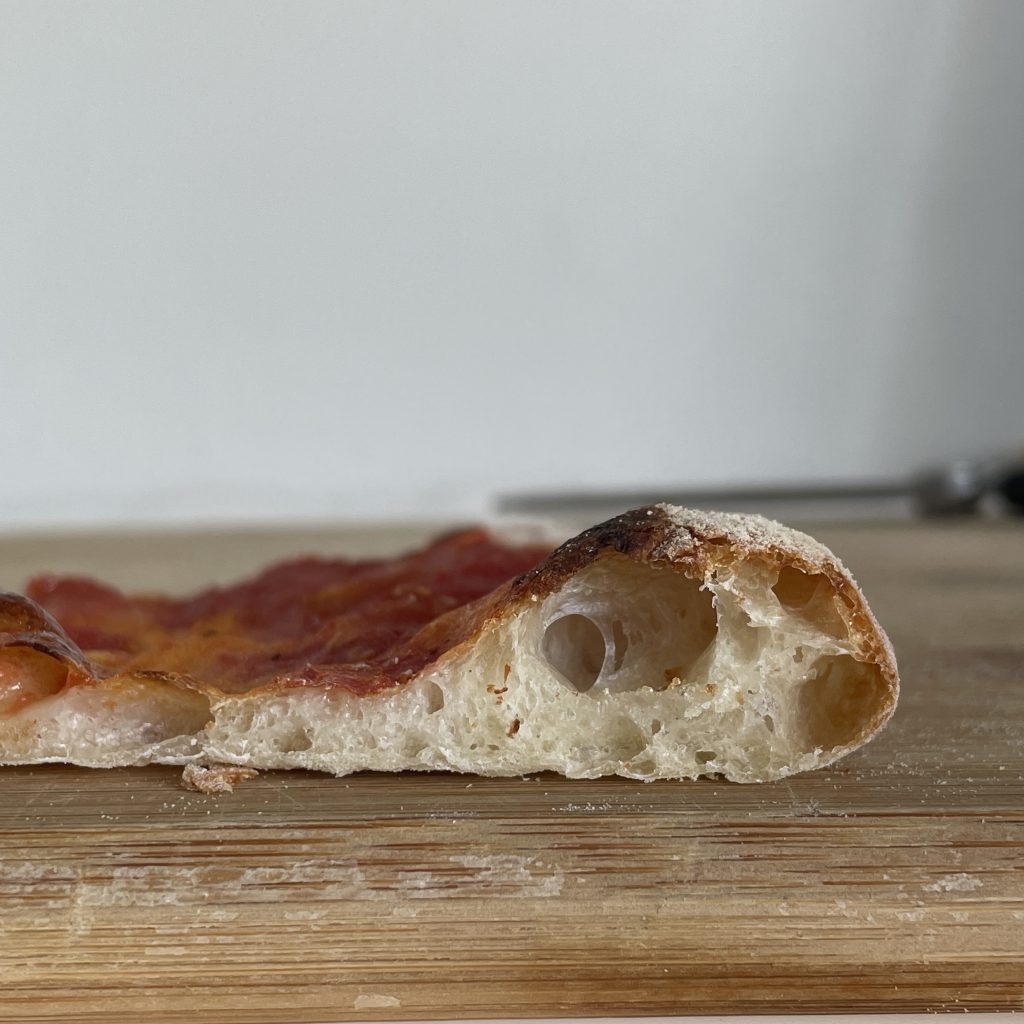
After one day (24 hr) of cold fermentation, the control dough had an open crumb structure with large air pockets; that effect disappeared at 20% with a closed crumb structure, yet it was soft to bite. At 10%, the crust shows large air pockets (slightly smaller than the control dough) and small holes evenly dispersed throughout the crust. The even distribution of air pockets continues at 15% and 20%, which may be the reason for its structure and softer texture.
As for browning, all doughs with water roux showed browning after 5.5-6 minutes and complete browning after 10-11 minutes. The control dough took an extra minute to brown.
👀
Observation
Control – large and small air pockets; angled rise.
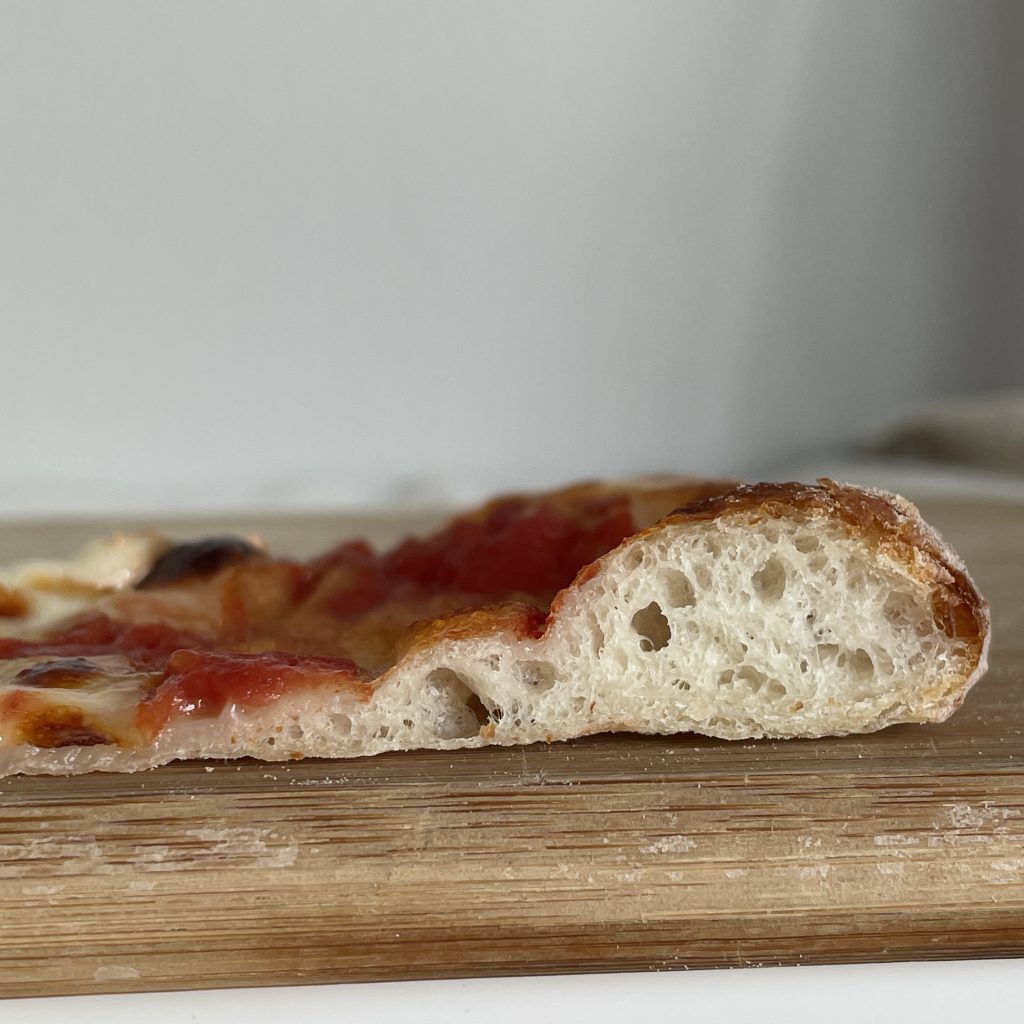
5% – large and small air pockets; puffy top.
10% – large and small air pockets, flatter top.
15% – uniform air pockets.
20% – small air pockets, closed (cake-like) crumb structure, flat top.
Cooled down after 30 min
There’s no visual difference once it cooled own. 10%, 15%, and 20% remained moist, while control and 5% were slightly drier and difficult to chew.
Final thoughts
Open to closed crumb structure
Each time you add water roux, the crumb structure changes from open to closed, resulting in a softer and more tender dough. Use around 10% to maintain a similar chewiness to the control dough while still having an open crumb structure. Use 15%-20% to achieve a closed crumb structure and a softer texture. Adjust the amount based on the type of pizza crust you are making. Use less water roux for a Canotto-style crust to preserve the gluten network and get more rise. Use more for a NY-style crust to soften the closed crumb without using sugar or oil.
Increase in crust’s height
Significant differences were observed in the height of the crust and an increase in the stretchiness of the dough. As the percentage of water roux increased, the dough became more resistant to stretching and had a smoother appearance during the proofing and stretching phases. After reaching 10%, the dough became much easier to handle, which could be beneficial for beginners in pizza-making. High-hydration pizza doughs typically require gentle handling and stretching, but incorporating water roux allows for increased hydration while making it easier to work with.
Slightly sweeter and browning
Finally, 10%, 15%, 20% doughs had a slightly sweeter taste, probably because there were more damaged starch in the dough compared to the control dough. As for browning, all water roux doughs browned faster than the control dough by a minute.